my new “office”

I don’t consider my blog a decorating/home improvement type website by any means, but we just finished up a project that I thought would be interesting to share, especially for those of you with small houses that can’t sacrifice an entire room for a home office. I posted a long time ago about my plans to convert our closet into an office (or “cloffice”). Well, it took a long time, but my husband really pulled through for me. This was a lot of work for him, and I appreciate it so, so much. In fact, I feel a little undeserving.

It is beautiful.

DSC_0327

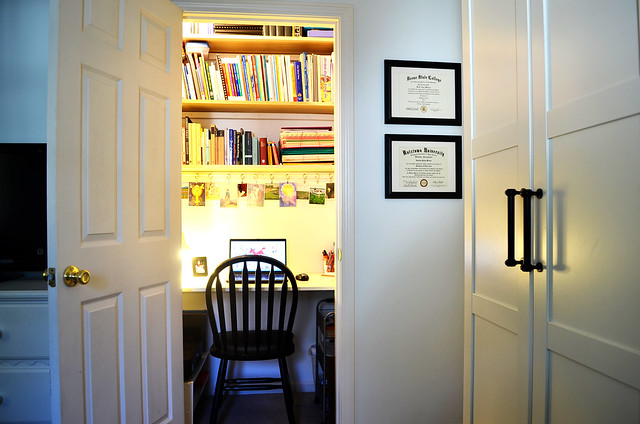
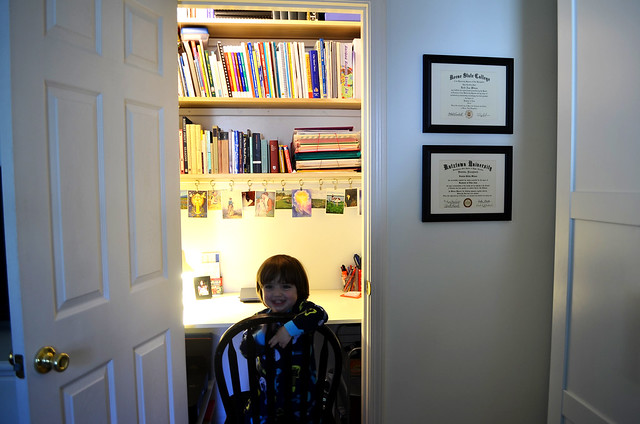
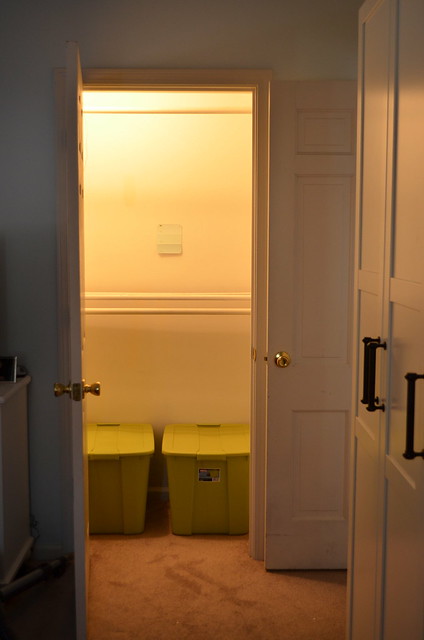
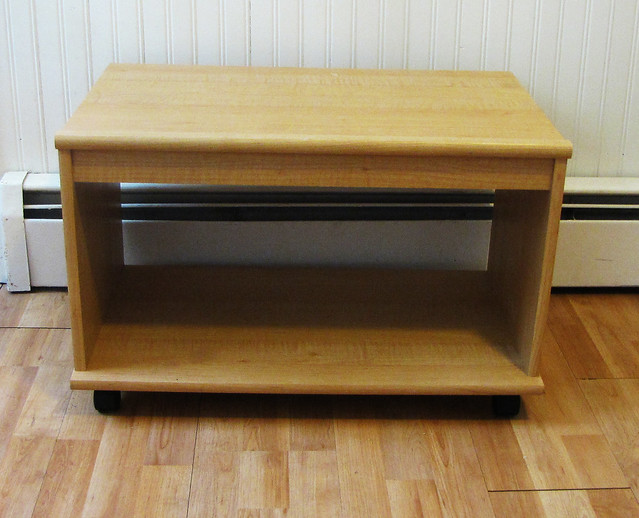
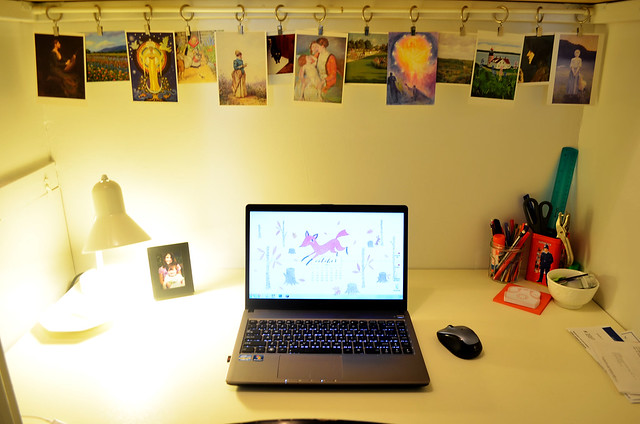
The photos don’t do it justice. It looks so small, but when you are working at the desktop it actually feels quite spacious (the closet is about 2 ft. deep x 4 ft. wide x 8 ft. tall). Damian used 2×2 pine ledgers which we topped with poplar board shelves (they are very solid and will probably take longer to bend than pine under all those books). The desktop is a piece of 3/4 inch thick plywood custom cut for me by Damian and is supported by 1×4 ledges on three sides (back, right side, and the front on either side of the doorway). We had to do this crazy setup because our bathroom shower access is on the left side of the closet, and we wanted to be able to reach it easily and quickly. It works out really nicely, though, because the gap on the left side allows me to run cords up between the wall and the desktop. Underneath the desk I have my printer on the left side, and a cart with all of my writing supplies and stationery on the right side. It is so wonderful to have a place for all of my things.

DSC_0335

I added our college diplomas on the wall behind the bedroom door just for fun (you can only see them from inside the room with the door closed, so I don’t feel like I’m showing off). I also have a few more things I’d like to add, like a corkboard and some wall-mounted file storage, but I’m enjoying it just the way it is for now. I plan to do a lot of research from this space, as I seem to have become obsessed with genealogy again! I’d also like to try writing some poetry…it will all be terrible, I’m sure, but at least I have a nice space in which to write it!

Lastly, I owe a big thank you to my wonderful husband, Damian, who made this dream (and many others) come true. I feel so loved.

DSC_0313

Follow:

a project // cloffice

I am planning to create a super-amazingly-awesome craft area for me and the kids in the basement but, at the speed that renovations happen around here, the kids will probably be in college before that happens. Enter: the cloffice.

If you’ve spent any time browsing blogs or Pinterest, you probably know what a cloffice is. But, for those of you who don’t, it’s basically a closet that has been transformed into an office area. There are many varieties of cloffices out there, and I’ve decided that I want/need one of my own.

Last year we installed two IKEA Botne wardrobes (weirdly enough, a HUGE amount of the traffic to my blog comes from people searching for info about the Botne). That freed up our regular closet, which has been used to store everything from sewing supplies, to homeschooling materials, to paper towels and the vacuum cleaner. Here it is in its current state:

DSC_0974

Wouldn’t it make an excellent cloffice? I think so! All it needs is a little paint, some sturdy shelves, and a desk. I can’t wait to blog, work on homeschool plans, and do some serious research for my last(!) undergraduate course in my own little space.

Here are a few examples of really nice cloffices that I will be referring to for inspiration:

From Shoestring:

From IHeart Organizing:

And, from The Mustard Ceiling Blog:

Follow:

pics from the big bash

Here are a few pictures that my mom took at Zane’s 1st Birthday party. I am so envious of her camera (and her photography skills!). Thanks for capturing these beautiful memories, Mom!

DSC_0252
One.

DSC_0282
We actually finished the kitchen on time!

DSC_0275
Future chef.

DSC_0311
Happy Birthday, Zane!

DSC_0334
Go, baby, go!

DSC_0244
Love.

Follow:

a project // play kitchen part 2

Back in October, I posted about a DIY project I wanted to try: upcycling an old piece of furniture into a play kitchen. Like most things in my life, it went on the backburner (no pun intended) while I attended to more pressing matters. However, our little guy is going to be turning 1 next month (!), and I really wanted to give him a play kitchen for his birthday. He LOVES to watch me cook, and now that he is pretty mobile, I thought he might like to have a little place of his own to practice his culinary skills.

This morning, I randomly thought of this old TV stand that has been sitting in our basement, unused, since we moved. The minute I brought it upstairs, I knew I had found just the right thing to make Zane’s kitchen.

tv stand

As you can see, it is the perfect height for a little one. Here is Zane giving it a test run.

Untitled

And, here is a terribly rendered Photoshop mock-up of what I hope it will look like when it’s done. I’m not going to get too fancy with oven doors and all that jazz. I’m just going to have some cute curtains and some baskets underneath where he can store his “food” and dishes. That way, there will be no pinched fingers. We can upgrade to something fancier when he gets bigger. Also, the sink fixtures in this photo are way fancier than what I am planning to use.

play kitchen mock up

I think he will love it, and I can’t wait to work on it.

UPDATE 8/23/2012: We finished the kitchen just in time for Zane’s birthday!

And, here’s a little video of the kitchen “in use.”

Follow:

a project // the basement

We have an unfinished basement in our new house. It is John Deere green. It was painted this horrid shade by the previous owner. I am not joking. I have photos to prove it.

When we bought our house, we had about two months to move in before our lease on our rental was up. I thought, “Fantastic! we can actually be methodical and move things in and put them away, instead of throwing everything in the basement!” But, I was pregnant, and we had to wait for some electrical work and painting to get done, and pretty soon we had just a couple of weeks. Then, I got a kidney stone. Ouch! In the end, my parents, saints that they are, spent the greater part of a weekend moving most of our stuff for us, with help from my husband. With the time constraints in place, guess where everything ended up? That’s right, in the basement.

Here is a photo of its current condition:

Untitled

Horrifying, I know. The good news is that beyond the hideous color, it is actually in great shape. Our house is 960 sq. ft. (pretty darn small). But, if we were able to actually use the basement as living space (i.e. playroom, office, etc.) it would be like having two houses! Awesome!

Unfortunately, we are living on one income while I am home with the little one, and we just spent the year buying houses and having babies and kidney surgeries, so we don’t have much in the way of a budget. Read: our budget is non-existent. However, we would eventually love to put up some insulation and sheetrock the walls, and then wall off the ugly oil burner/oil tank area. We don’t want to create rooms down there, per se, but getting rid of the utility eyesores, and then creating spaces within the larger area for playing/working/laundry would be ideal.

Of course, we have all kinds of exposed beams, and joists, and pipes, and whatnot on the ceiling. Drop ceilings are expensive, and very basement-y looking, so that’s not a good solution for us. However, as I was looking on Pinterest the other day, I saw an image of a room with a white painted ceiling. It had exposed beams that looked very similar to how our basement ceiling looks. Here’s the inspiration photo:

Untitled

So, I started thinking, “Hey, I wonder if anyone has actually painted their basement ceiling before?” Turns out, many people have! Here are some great examples: (Note: you can find the source info for these photos by visiting my Basement board on Pinterest.)

Untitled

Personally, I would love to do a light blue, kind of like these rooms (neither of which is a basement, so you’ll have to use your imagination):

Untitled

That’s my plan, for now. Of course, the first step is taking care of the “stuff” that is everywhere! I plan to donate, recycle, and/or toss anything and everything I can. I planned to do that as we moved but, for the reasons mentioned above, that didn’t happen. Updates to follow as we make progress!

Follow: