what we’ve been up to lately

My apologies for having disappeared from this space. It seems that when you’re home with TWO kids, things get a lot busier! In any case, we’ve been spending our days at the town pool, trying to beat the heat. And, one of us has gained a new skill!

Hope you are all enjoying your summer, and I’ll try to be better about posting!

Follow:

new closet post!

Well, I’ve finally gotten all of the photos of the assembly and installation gathered together, and I’m ready to tell you all about our closet adventure! Our house is a small ranch, and each of the bedrooms has a built-in closet, which is great. But, there was just not enough space for two adult’s clothing in one small closet (oh, the troubles of a middle-class life of plenty!). I started doing some research, and I thought that standalone wardrobes might be a good solution. I knew right away that I would probably find what I wanted at IKEA. And, I was right! After considering several options, we decided to purchase two BOTNE wardrobes from IKEA.

We made the 2+ hour drive down to the New Haven IKEA on a Sunday after my daughter had left for Florida with my parents for vacation week (I figured it would give me something to do so I wasn’t obsessively texting them to make sure she was okay!). Of course, it was raining. And, I mean RAINING. My poor husband got absolutely drenched while we were trying to load to boxes into my dad’s truck. Thankfully, we had brought some plastic with us to cover up the boxes, so there was really no damage to the wardrobe parts during the drive back in the rain.

And now, without further ado, an illustrated view of the assembly process.

Step 1: Unpack boxes (it’s always handy to have a helper, or two).

closetflatpacked

Step 2: Begin assembly (again, help is always appreciated).

closetcathelper

Step 3: Break something (or how our BOTNE wardrobe earned the nickname “Botch-Me”). Thankfully, this cross-bar did absolutely nothing for the structural integrity (ha!) of the frame.

closetbrokenpiece

Step 4: One Botch-Me completed!

closetonedone

Step 5: Two done, and in place! Now we’re getting somewhere!

closettwodone

Step 6: Kelli installs the shelves and rods and fills her side with clothing and shoes because she is too impatient to wait for Damian to come home from work. Pretty colors!

closetwithclothes

Step 7: Damian completes the assembly of his side, under strict baby supervision.

closetshelves

Step 8: Completed wardrobes (minus handles).

closetalldonenohandles

closetalldonenohandlesbedinview

Step 9: The most wonderful thing that has ever happened to our clothing, ever. I am in love.


Assembly took about four days, with many breaks in between for working (Damian) and other things. I am beyond pleased with how this all turned out. The wardrobes actually blend together seamlessly and look like they are built-ins. We have so much well-lit, clean space for our clothing, and now we can use our old closet to store other things, like the vacuum (which has been living by the front door since we moved in). As always, I am impressed by the quality, design, and price of IKEA’s products. They have a lot of other wardrobe storage options, so you should check out their website if you’re in need of more space for your stuff.

Follow:

a project // the basement

We have an unfinished basement in our new house. It is John Deere green. It was painted this horrid shade by the previous owner. I am not joking. I have photos to prove it.

When we bought our house, we had about two months to move in before our lease on our rental was up. I thought, “Fantastic! we can actually be methodical and move things in and put them away, instead of throwing everything in the basement!” But, I was pregnant, and we had to wait for some electrical work and painting to get done, and pretty soon we had just a couple of weeks. Then, I got a kidney stone. Ouch! In the end, my parents, saints that they are, spent the greater part of a weekend moving most of our stuff for us, with help from my husband. With the time constraints in place, guess where everything ended up? That’s right, in the basement.

Here is a photo of its current condition:

Untitled

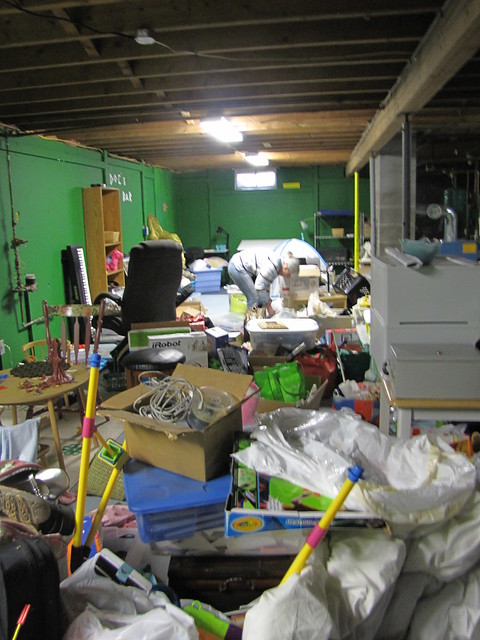
Horrifying, I know. The good news is that beyond the hideous color, it is actually in great shape. Our house is 960 sq. ft. (pretty darn small). But, if we were able to actually use the basement as living space (i.e. playroom, office, etc.) it would be like having two houses! Awesome!

Unfortunately, we are living on one income while I am home with the little one, and we just spent the year buying houses and having babies and kidney surgeries, so we don’t have much in the way of a budget. Read: our budget is non-existent. However, we would eventually love to put up some insulation and sheetrock the walls, and then wall off the ugly oil burner/oil tank area. We don’t want to create rooms down there, per se, but getting rid of the utility eyesores, and then creating spaces within the larger area for playing/working/laundry would be ideal.

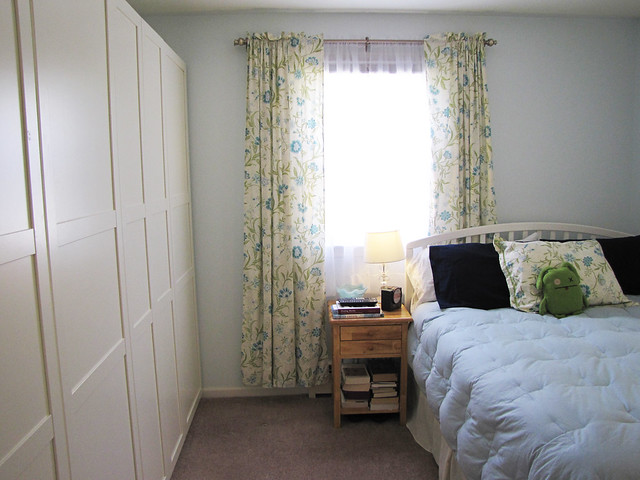
Of course, we have all kinds of exposed beams, and joists, and pipes, and whatnot on the ceiling. Drop ceilings are expensive, and very basement-y looking, so that’s not a good solution for us. However, as I was looking on Pinterest the other day, I saw an image of a room with a white painted ceiling. It had exposed beams that looked very similar to how our basement ceiling looks. Here’s the inspiration photo:

Untitled

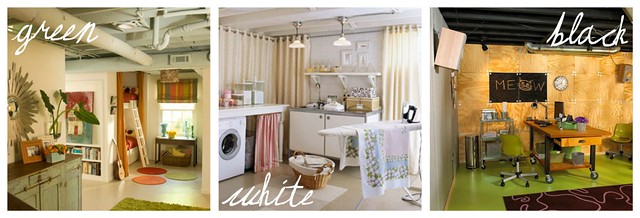
So, I started thinking, “Hey, I wonder if anyone has actually painted their basement ceiling before?” Turns out, many people have! Here are some great examples: (Note: you can find the source info for these photos by visiting my Basement board on Pinterest.)

Untitled

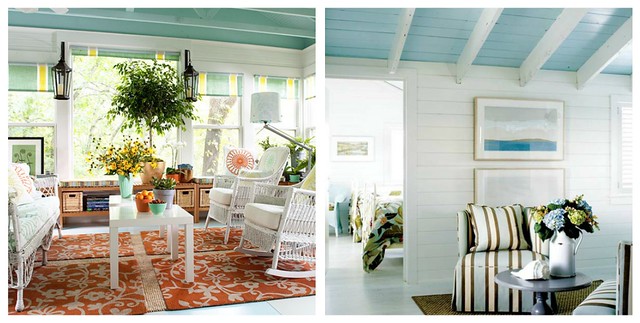
Personally, I would love to do a light blue, kind of like these rooms (neither of which is a basement, so you’ll have to use your imagination):

Untitled

That’s my plan, for now. Of course, the first step is taking care of the “stuff” that is everywhere! I plan to donate, recycle, and/or toss anything and everything I can. I planned to do that as we moved but, for the reasons mentioned above, that didn’t happen. Updates to follow as we make progress!

Follow:

a fall day

Just some scenes from a random day this past week when the sun was actually shining…enough with the rain and snow(?!?!), already!


Follow: